Showing posts with label craft. Show all posts

Saturday, July 19, 2014

Retro High Waisted Skirt Tutorial

I have been in a retro clothing sort of mood lately, and decided it was high (get it...haha!) time that I made myself a new skirt.  I went on down to Birch Fabric and picked out some of the organic fabric that they had and started on this great skirt!


Here is what you need for this skirt:

·      2 Yards of Fabric
·      Coordinating thread
·      Scissors
·      Iron and surface for ironing on
·      12in matching zipper
·      Tape measure
·      Sewing machine
·      Needle for hand sewing
·      1 sew on snap

How to make the skirt:

Start with your 2 yards of fabric.


You will be cutting the 2 yards into 2 pieces.  The larger piece will be the body of the skirt, and the smaller the waistband. 

Start with measuring 7 inches into the fabric.  Mark (easiest to do with chalk but could also use masking tape or marker that won’t bleed.)  Cut the 7 inch strip off.  This strip will make a 3 inch (or so) waistband after finished.


Next you need to measure your waist with a tape measure.  If you don’t have a fabric tape measure, use a string and then measure the string. 

NOTE:  This measurement will determine where the gather will sit.  I wanted this to be a nice high waist, so I measured at the smallest part of my waist.

Now that you have measured your waist, make sure to ADD 2 inches for seam allowance (so if your waist is 32, add 2 to make 34 inches.)


So you should now have a strip that is 7 inches wide and your waist+2in long.

Warm up that iron and press the hemline, starting with pressing under ½ inch….


Then another 2 inches for a wide hemline.  Now you can hit the ol’ sewing machine.  Stitch the hem close to the top of the hemline. 

Optional: Do a second top stitch along the bottom of the hem for added interest and detail.

Now fold the skirt body in half with right-sides together and pin.  Make a mark 9 inches from the top of the skirt.  This will be left unstitched foor the zipper.  Stitch at 5/8 inch seam allowance from the bottom of the skirt up to your mark.


Now to gather.  Some newer machines can do this for you.  But not mine, so if you are like me, you will need to hand gather.  This is not difficult, it just takes a little time. 

Baste about ½ inch from the top all along the top of the skirt.


To gather, carefully pull on the top thread until it begins to pucker.  Ease the gather into the skirt and continue in this fashion from both sides until it is the same length as the waistband.


Then pin to waistband with right sides together, easing the gather to be even and match the waist as you pin.  Then stitch together, being careful not to catch the gathers unevenly.


Open back up and press seam allowance toward the waistband.


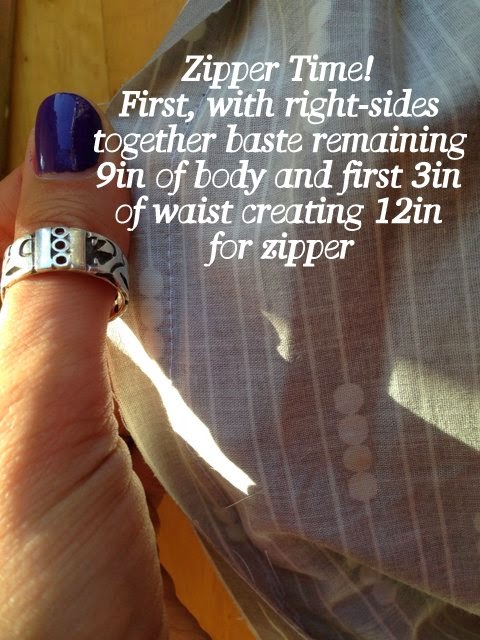
Now we can put in the zipper!  The easiest way to do a zipper that I have found is like this…

First fold your waistband in half and mark the halfway point.  Open back up, keeping that mark.  It should be just about 3 inches or so. Now baste opening at the back of skirt (that 9 inches you marked off) through waist gathering up to that 3 inch mark.


Now pin the zipper down to the basted seam allowance.


Now attach your zipper foot and stitch (if you don’t have one, just get as close as you can to the seam, but go slow.  It might be a little wonky, but I assure you, you are the only one who will notice.)


Zipper done!  Now let’s finish the waistband.

Press under ½ inch on the raw edge.


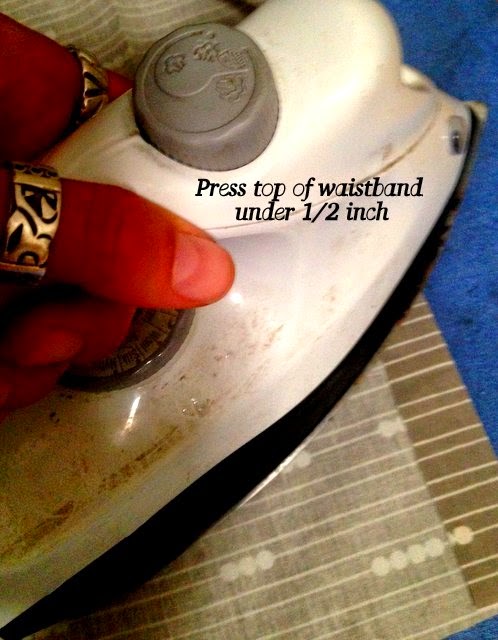
Now fold the waistband in half and press and pin in place.  You will want the ½ inch that you just pressed under to cover the raw edges of the gathered waistband seam allowance so you have a clean edge.


Then stitch close to the seam, and continue all the way around the band, catching the zipper and creating a clean, top stitched edge all the way around.


You have just completed the main part of the skirt!  Yay!  Just one last finishing touch.  A bow.

To make the bow, you will need to cut out a piece from your 7 inch remaining strip. Leave it at 7 inches wide and cut 25 inches long.

Then fold in half hamburger style with the right sides together.  Stitch up the 2 long edges to make a little pillowcase looking block. 


Turn it right side out, and press.


Then press ½ under on the open seam to create a clean edge.  Hand stitch this closed with an invisible stitch.  Not sure how to do that?  Check out this great tutorial at Positively Splendid here.


Next we will cut a smaller strip – this one will be 4 inches wide and 6 inches long.  This will make the center of the bow.  Fold hot dog style (along the long side) and stitch.


Turn this little guy right side out, and press it with the seam at the center back.


Now wrap the little strip around the block you made to create a bow.  Turn under the small strip’s raw edges and pin in place.   Hand sew it into place.


Now you have the big, adorable bow!


Finally, we need to secure it to the back of the skirt.  To do this, center onto the back, and hand tack the left side onto the skirt, catching only the back layer so you don’t see the stitching from the front.  Make sure to secure as well as you can so it won’t rip off.

On the other side of the bow, sew on one side of your snap.


Now try on your skirt.  If yours behaves like mine, the waist was a little looser at the top.  So I placed the other side of the snap a little further in to help cinch it up just a little.


Hand sew it into place and you have finished your awesome skirt.


Now all you have to do is put it on and show it off to all your friends.  Believe me, they will think you are a genius!


Friday, March 8, 2013

Feature Fridays....Tea Rose Home

I sorta missed my Feature Friday last week.  Whoopsy!  But I am back this week!  And this week I am excited to share a fun, crafty blog called Tea Rose Home.  It is a very sweet blog, with a lot of great tutorials.  I just love her style, and am having a lot of fun checking this site out.

I have been way into pom poms lately.  So I was loving this post on this great scarf!


I also just love this chair re-do!  I have been thinking about how to re-do some of my furniture lately.  Check this adorable chair out!


And then there is this awesome tutorial on an adorable embellished cardigan.   This is how I found this great blog, from a pinterest post with this fun tutorial.


SO, so cute!  I love this site now!  I am off to go peruse more!  I hope you will check it out and enjoy as much as I do!

Happy weekend!

Ash


Sunday, February 10, 2013

Hair bands and bike seats...

I just love yarn carfting!  I love the fact that I can create something fun and functional from a piece of string.  And I love the fact that that piece of string used to be from an animal or in some cases, an old plastic bottle.  I love the process all the way through.

I recently learned how to cable knit, and love it!  (I think I may have said that verbatim in a previous post! hehe)  I have also been loving headbands as of late, so I decided I needed to make myself a new headband with a cable on it.  Super fast and easy, but also really rewarding!


I had fun playing with design and deciding how 'long' the cables should be.  I will try and share my pattern soon.

I also love to crochet, and I definitely better at it than knitting.  I have been doing it a lot longer, for one thing.  So it is fun for me to get inspiration from something and try and duplicate it.  For example, I found this picture on pinterest of a 'bike seat cover' that someone crocheted.  I could not track down the original poster or creator though.

(Source and creator unknown)

Soo....I decided I'd try something like it.  I used a much larger hook and different yarn, but here is my version....


I was recently given a bunch of colorful acrylic yarn, and I thought that it would hold up pretty well to the occasional (or not so occasional here in Eugene) weather.

I love the way it turned out!  I may have to come up with the pattern for this to share, too.

Happy yarn crafting!

Ash


Monday, January 21, 2013

New knitting skill! Cabling on wristlets...

I am so excited!  I recently went to a knitting social at JoAnn Fabrics.  My hubby works there and suggested I get some folks together to have a teacher come in and show us some tips and new skills.  I had been wanting to learn how to cable knit for some time, but just couldn't quite get the tutorials.  Now that I have learned it, I don't know why I found it so hard!

So I put my new skill to use right away by knitting up some wristlets for my mom.  They came out so good, that I think I will have to make some for myself!


They were knitted flat and then sewn up the back.  I got the pattern from Lion Brand here.


LOVE!!  I found some super soft acrylic/wool blend yarn and they knitted up quite quickly.  Amazing how adding that element makes such a huge difference.  

I think I may try making a tutorial, since I found it so tough at first to understand.  Maybe I can help shed some light for those who are self taught like me and knit kinda weird. :)

Hope you have been enjoying the long weekend.  Happy MLK, Jr Day!

Ash


Saturday, December 29, 2012

Holiday crafting bonanza!

Well, now that the holidays are over, I can finally share some of the things I made for folks!  There are a few people yet to get their gifts...so...hope this doesn't spoil anything for them...hehe.

One of the things I really had fun with this year was kitchen goodies.  In particular, crocheted dishcloths and hotpads.  I had fun making different styles and colors for each of the people's kitchen color schemes.

Here are actually just a few I made.....


This adorable pattern for the hot pad house can be found here at Lion Brand.


So much fun to create!  I actually probably spent more time on these than I should have, and did not finish some of my other gift to folks.  So, they are getting theirs late, and I will share those with you soon. ;)

Ash

Saturday, August 25, 2012

Feature Fri...errr....Saturday...A Law Student's Journey!

Well...if I keep on like this I may have to change Feature Friday's to something like Star-blogger Saturday.  But for now, we will keep it Feature Friday, even if I am a day late much of the time.

This week, I am featuring Kitty's blog, A Law Student's Journey.  I LOVE this blog.  At first I did not know what to expect with the title.  Maybe a blog that was mostly about her life in law school and crafts here or there.  But this blog is SOO much more!

Kitty has some wonderful pics, awesome crafts, delicious recipes and great ways to get other bloggers traffic to their own website, which is super sweet!  And of course, stories from her law school life, with tips and thoughts for other soon to be law school students or current ones.

But...I gotta show a few of her wonderful creations.  How about this TOMS flag wallet?


And you know how I love my recycled and enviro crafts...so this is one of my faves!  Flower paper with a cute spoon plant marker!


And I love this birdhouse cardholder.  Hmmm....I need a cardholder for the office and home...


I could just keep going.  But, you should go check it out for yourself.  She also has her own etsy shop, and lots of other goodies to check out.

Kitty - Thanks so much for sharing all your great creations, wonderful photos, and interesting stories!

Ash

PS - 
Guess what everyone?  I finally have the option to subscribe my email!  So make sure to sign up on email in the sidebar to make sure you get all the Feature Friday lowdown each week, as well as other fun stories!  (And while you are at it, join in as a follower!)