Showing posts with label felt. Show all posts

Saturday, September 22, 2012

Feature Friday... paper-and -string

This week I'd like to feature one of the first blogs I ever really got into.  It was before I began blogging, and I was really getting into felt as a medium.  I was searching everywhere on fun designs and ideas with felt and came across paper-and-string.  Her blog walks through her crafting life, and I have loved watching her move from her home into a real art studio and organize her crafting world.  It has been an inspiration to see someone take their crafting business to new levels and succeed.  

One of the first things I loved on her site and had to try making was her little hand-stitched felt purses from her tutorial. How cute are these?


I, of course, forgot to take pics of the ones I made for friends for Christmas before sending them off.  Harumph.  But other people remembered better than I, and they have shared their creation at paper-and-string's felt purse flicker group.  Love it!

Like I said, she has been making little felt cuties for her etsy store for some time.  They are totally adorable, every single one of them.  Like check out some of these little guys to get ready for the holiday rush. 


Teehee!  They are so cute!  

And ack!!!  How can you not love these little guys!?


I think I'd call it an army of adorable!

So go check her site out for more inspiration, cute tutorials, and see what you need at her etsy store.  Paper-and-string, thanks for sharing with us!

Ash


Saturday, September 1, 2012

Feature Fridays...Checkout Girl

I love felt...and when I was first really getting into the fun stuff you can make with it, I came across Melissa's blog, Checkout Girl.  I cannot believe the adorable stuff that she makes with felt!  Her embroidery with felt is almost too cute.  For Christmas one year I tried to make something sorta similar, and was wishing I had just purchased one of her creations.  They are way better.

For instance...you know I love chickens.  So how awesome is this?


Teehee!!! Check out the evolution of this little chicken creation here.

The applique that I tried was from this tutorial (which was featured on Sew Mama Sew) called, Little Pink House.  Mine was ok, but hers is so cute.


Cute, right?

And I just found this one....


LOVE!  

Check out her blog and her etsy shop.  Right now.  And tell me that you can even come close to her embroidery and applique.  The details that she gets into on faces and people, out of this world!
Melissa, thanks for sharing your talents and your process with us.  So fun to see!

Ash
PS- For those that visit my blog, if you have not yet, join my blog on the right sidebar, or get new posts to your email by subscribing! 


Tuesday, March 13, 2012

Angry weather...

The weather here has been so strange....we got 3 days of gorgeous, spring weather where you could even wear a t-shirt, followed by a day of pounding rain, followed by a day of 45-60mph winds then followed by some snow.  Eugene's elevation is not much over 400ft...thus snow is a rare occurrence anyway, let alone with all this other fun weather.

So...I felt like this is what the clouds were feeling like....they must be angry...


Poor clouds....hope they get it all out of their system soon and let the sun come out and play!

Ash


Tuesday, March 6, 2012

2 Felt Tutorials for You!

Hi there!  I just love to play with felt when I want to make gifts for friends.  Felt gifts are quick to make, but always come out super cute!

I want to share 2 tutorials with you from my recent makings...


And...


First...the flower pin....


1.  Start with making petals in the size you'd like. I cut out 6 petals, but then decided I liked the look of 5 better.

2. Cut out the same shape but slightly smaller of a contrasting color for the inner petals.

3. Take some embroidery floss (I used 3 strands) and begin sewing through both petals by adding a definition line down the petal combo.

4. Fold bottom of petal combo and sew through it to add shaping.

5. Repeat and start sewing together at shaped side of the petals.


7. Now that they are all sewn together....

8. Cut out the contrasting color for the center of the flower to a size that covers the rough spots of the petals.

9. Blanket stitch (Futuregirl has a nice tutorial for blanket stitch here) the center of the flower.

10. I found a while back a bunch of vintage buttons.  Find something you love to add as the 'pistol' of the flower.

11.  Add a pin sewn or glued onto the back, or add a barrette.  Use to embellish a hairband or your favorite outfit! 


Now...to the mini felt pouch....


This is super cute and super easy to make!

1.  Cut out a piece of felt about 3 inches wide by 8 inches long.

2. Fold to create pouch part....

3. And leave some at the top to eventually fold over to make the closing top of pouch.

3 1/2.  I sort of skipped this part in the pics...sorry!  But this is where you would embroider on your design to the pouch before sewing it up. 

4. Blanket stitch around folded pouch and around top of pouch.  Also cut a small slit the size of your button for the closure and blanket stitch around the button hole.

5.  Sew on your button and admire your work!  Great for cosmetics, could make a little smaller for biz cards (I am making one for just this purpose), or change the size for your sunglasses. 

Enjoy!  If you make some, share your creations by emailing me at amiller37@gmail.com!

Ash


UPDATE - Check out this tutorial and lots of other great tutes at A Law Student's Journey for their Tute Tuesday!  

Tuesday, February 28, 2012

Too much 'gawking'....

I have been pretty busy lately, and have not had a ton of time to work on crafts and/or take pics of things that I finished in the recent past.

But...somehow I have had some time to spend in the 'gawkerverse', navigating through wonderful things found on craftgawker and dwellinggawker.   While I use my time for playing on the computer instead of working my real job or working on my crafting, etc, I will share some of the wonders I have seen...

Flying carpet rug?  Yes...I do think this looks way fun.  Check it out on this site.


Simple tutorial on light box photos...I am pretty sure I need to create a simple light box this week (or weekend)  to help me get caught up with photos to share....


Remember the TARDIS from Dr. Who that I made?  Well, look at Haley's creation from Zen of Making!  I love it!


Ok...back to work for reals.  Check out the gawkerverse...but be careful not to get sucked in and get lost out there! 

Ash


Sunday, January 22, 2012

For all the Dr. Who fans out there....

I have been waiting to give our friends over at Paper Elephant their holiday gift...and I have definitely been waiting in anticipation, as it came out just as I had hoped.  I knew I could not blog about it sooner, as they would have seen it for sure.

As you may have noticed, I have been kind of into soft sculpture as of late.  (See this post with my soft sculpture mounted deer head...hehe.)  Well, I got it in my head that it would be so fun to make a soft sculpture TARDIS from Dr. Who.  Hehe...thus why this is for all my fellow fans.


Hehe...

Also, things I have found in crochet soft sculpture world on Ravelry that are related that I may have to try out....


Or this big doll version of David Tenant as the Dr. by Nyss Parks...


Hehe...Ravelry has so many great patterns by creative people....I could go on and on!  (And, if you have a Ravelry, you can find mine here!)

Allons-y! 

Ash


Tuesday, January 3, 2012

Now that the holidays are over...here is what I made!

Well...due to potentially spoiling gifts, I decided not to post any of the things that I made for the holidays on the blog.  So now I can share with you all the fun stuff that I made!  Ok...well...not all, as I forgot to take pics of all the things.  But here are the ones that I remembered!

First, and one of my favs...I made my man and his best friend/cousin matching beard hats!  I got the pattern here at I'm Topsy Turvy.  A big thanks to Topsy for sharing this awesome pattern (and so I didn't have to figure it our myself!)

Don't they look awesome!  They are possibly the manliest men on the planet. :)

Next, I have to say that I had way too much fun with these pillows and they will soon become a staple in my near future biz. 

Now you can feel more secure with a gun under your pillow at all times....hehe

Don't we all need a pineapple pillow?

Man...I was just cranking out the fun/funny gifts this year...this is the last one I will share, but it might be one of the best!!

For the animal-friendly person/bad hunter in your life....

So cute and no animals were harmed to make him! hehe
Hope you had a wonderful holidays season and got to try out some fun crafting!  Hmm....now to decide what to make now that the holidays are over...

Ash

Sunday, December 4, 2011

Handmade Felt Advent Calendar Semi-tutorial

Every year I go off about advent calendars.  I always want to make something, and eventually end up buying a crappy one with the not-very-good chocolates in it.  But this year, I created both an advent calendar and a way to display the cards we get. 


I call this a semi-tutorial because I feel like it's pretty simple in the end.   And I am not always the most precise person.  But I took lots o' pics to share!

First, I cut out a big piece of felt.


I made it big enough to hold 25 pockets and wrap around a dowel to hang it.

Then, I decided on a color scheme.  I wanted to do purples and blues so I cut out a bunch of little pockets of different shapes and sizes.


Then I found some ribbons, ric-rack, cutouts, bows and vintage buttons for decoration.


At the bottom there, you can sort of see a ribbon with ribbons streaming from it.  I wanted a way to display the cards I get.  So I strung ribbons from the bottom so I could hang my cards from it.


Then it was time for some decorative stitching around the pockets, the cutouts and add the numbers.


I switched up the stitching on each of the pockets and added the buttons.  In order to make things go a bit quicker, I did the stitching and then I hot glued on the pockets.


Then I added some lettering at the top.  
Finally, this is what it came out like....


You can see the are little candies sticking out of the pockets.  (And you can see that it was actually quite nice today outside.)

It was a lot of fun to make, and did not take too super long.  I can see getting even more creative with the colors, embroidery and cutouts.  

Happy crafting!

Ash


Sunday, January 23, 2011

Hot air balloon

I have been wanting to make myself a fun pincushion for quite some time now (as I don't have one at all, somehow...)  But what would I make?

I was thinking about steampunk stuff, and what I first thought of was a hot air balloon.  I love the way steampunk styles everything as it were in the Victorian era.  And I also love hot air balloons for another nostalgic reason - as a kid, we would always go down to an area of town in Prescott Valley, AZ (my hometown) to watch as the hot air balloon pilots filled the balloon.

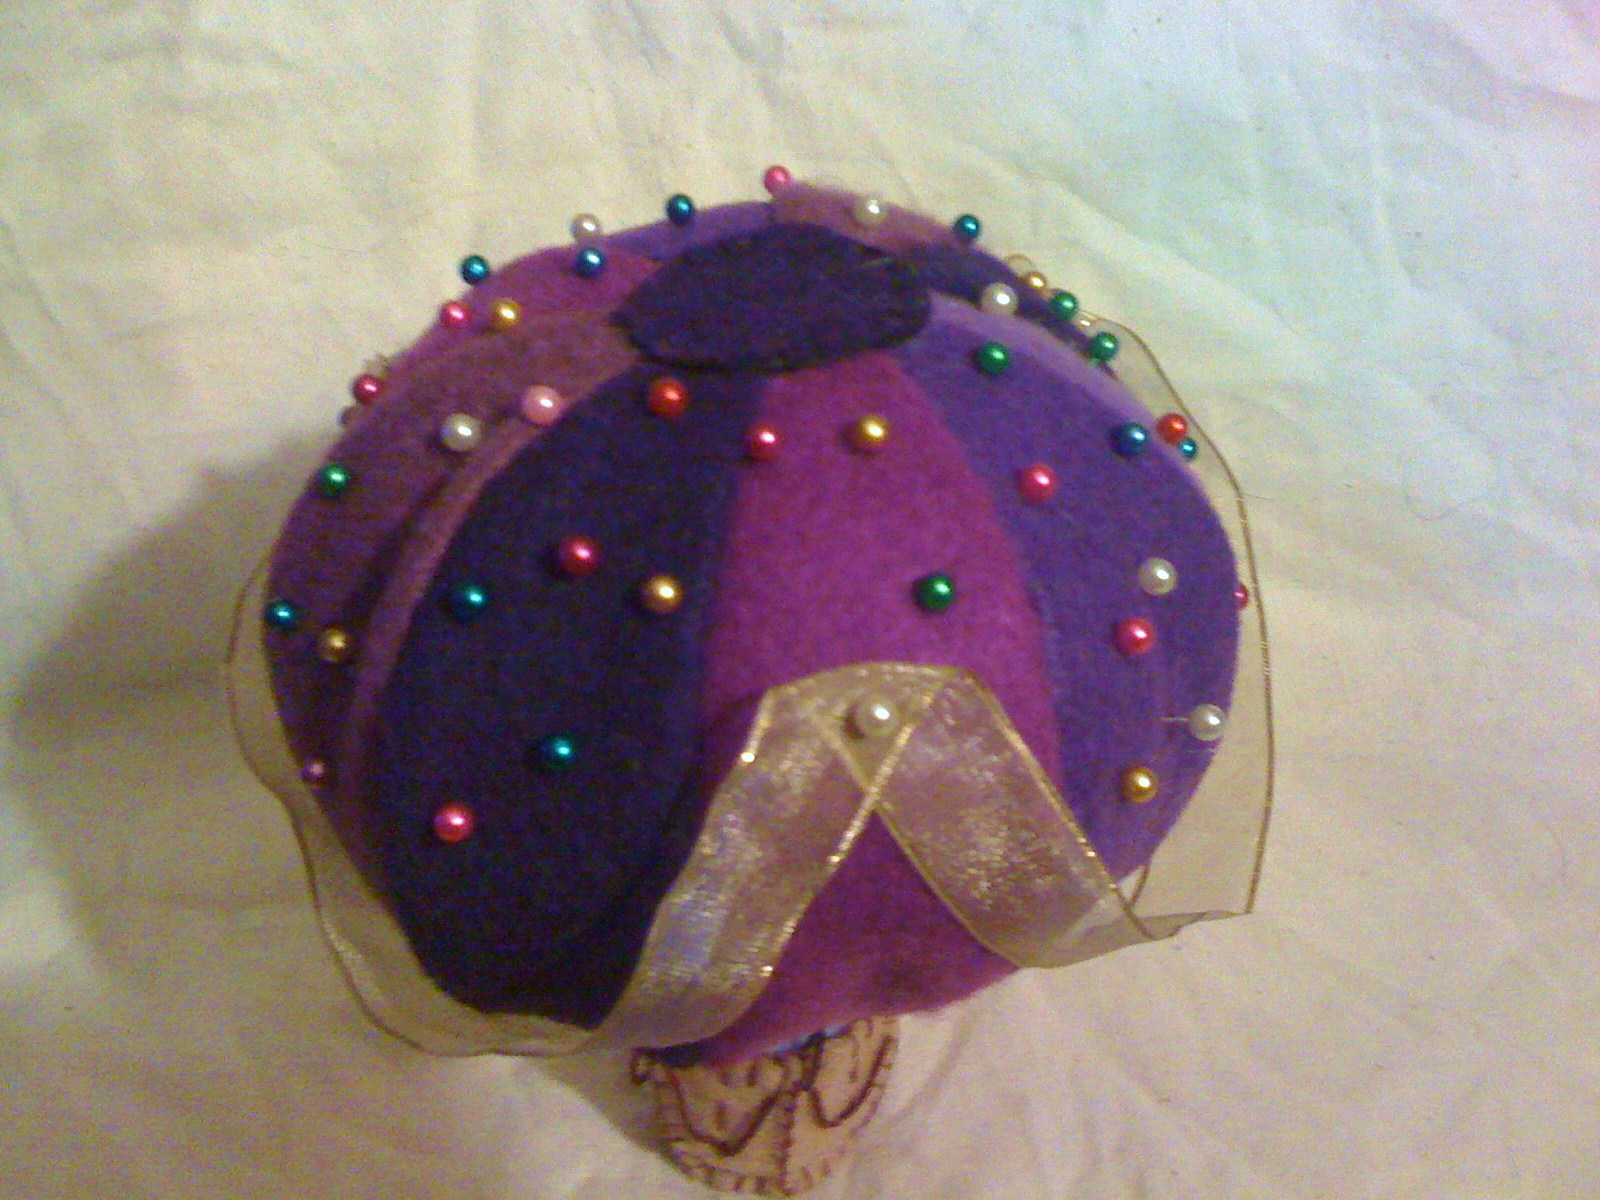
Thus, I made myself a new air balloon pincushion out of felt!


This was the first go at the basket.  The blue was to simulate sky...I ended up tweaking it as you will see.


And here are all the pieces of the balloon itself.


Almost done!  


And the final product!  I think it helps that I love the pearlized pins, so they made a great addition. I know its not super steampunk, but I love it none-the-less!

From above...


Quite a large pincushion, but the most fantastic one I have ever had!

Happy Sunday!

Ash


Saturday, January 1, 2011

Happy new year!

But before we jump into the new year, I will step back into the past of ol' 2010 to show off a few things. :)

Due to making presents for people that read this blog, I was unable to post most of the things that I made.  And then- to top it off- I forgot to take pics before I wrapped most of them!! Ugg!

But I did manage to get a few pics and can illustrate a few of the things I made with other means. 


These are some little tiny cork boards for several of my family members.  They are a few dollar store frames painted white and given fun felt flower and button embellishments.  The inspiration came from one of my very favorite blogs - LollyChops!  She is so creative and I just love the things she comes up with!  Thanks!

The thing that I think I spent the most time working on...well I forgot to get a pic of it.  But it is the Deady Bear (a teddy bear that died due to a giant bee stinging it in the chest) which is from the Son of Stitch and Bitch book. :)  It is all stuff to knit for guys. (When you click the link - you can scroll through the pics to get to the deady bear but it is one of the last pics)

I did manage to get a picture of Larry, the recipient of this awesome bear, whilst opening it. 


Haha!  He loved it! :D

While we were in Klamath Falls for the holidays, it snowed!


This is the great view from my grandparents' house.


And this was the tracks from the car when we tried to get up the driveway. ;)

But enough about last year!  Happy new year everyone!  New post to come to talk about the new year soon!

Ash


Friday, June 4, 2010

Quick little project-

Wednesday evening I decided I needed a little felt owl pin....

So just a quick post to go with my quick project.  I love how it came out! :)

Wednesday, May 19, 2010

Coming up for air....

Well the primary election in Oregon is over, and while my candidates didn't win outright, they did make it through the first cut and will go through to the general election.

I am glad that I am getting a bit of a breather today.  In the last week or so I had managed to get a few breaks to do a few crafts and see the outdoors a little.

This is the beginning of finally putting together my granny squares!  I love the way it is coming out!


This was a gift to one of my friends for her birthday.  So much fun to make!  She liked it so much she asked for a series!  I get to have even more fun! :)


Not a great picture, but I made this barrette to match a sun dress I have.  It was so much fun to make...I love felt!  I sewed beads on the center of the flower.

Then on Sunday Ric and I went on an evening bike ride to enjoy the last of the nice weekend weather.  While we were out on the riverbank trail, we stopped to watch a family of geese swim by.  Then they surprised us...


Here you can sort of see them in the sunny reflection swimming by.

Then they switched direction and started swimming toward us.

Here they are super close!  I thought this was great that they came up close just so I could take a better photo....


Then they came up the bank!  At that point Ric and I got a little nervous of mommy goose...

I love the babies!  I wanted to go play with the goslings, but that would probably result badly. :)  Our pics were taken behind a little fence we took shelter behind...hehe

Looking forward to having a little more time this week to get caught up on work I got behind on, as well as having some time to work around the house and spend with friends!  Yay!

Ash